T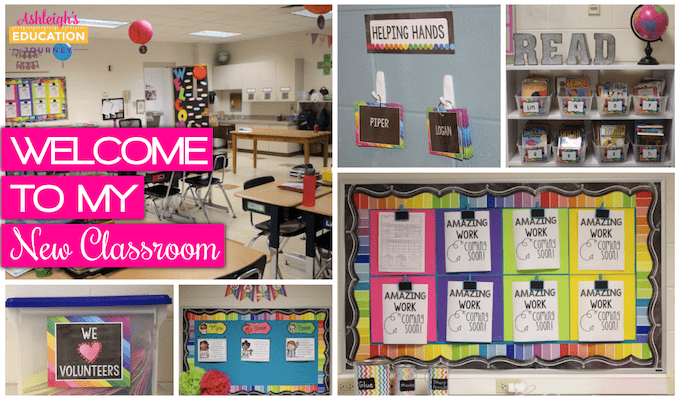
If your looking for ideas on prepping your classroom for the new school year, be sure to keep reading. I’m officinally finished with classroom preparation, because today ends my first full week of back to school. As you already know, inservice days and first days with students are a complete whirlwind (although, some of my favorite days of the year)! I often get so caught up in my “real job” that I forget to take pictures for blogging purposes, which happened again as I set up my new classroom. This means that I’ll be sharing my “real life” photos. Everything has already been moved and used, so you won’t see any perfectly straight rows or beautifully organized containers. However, I do think it will be a happy, fun, and functional space.
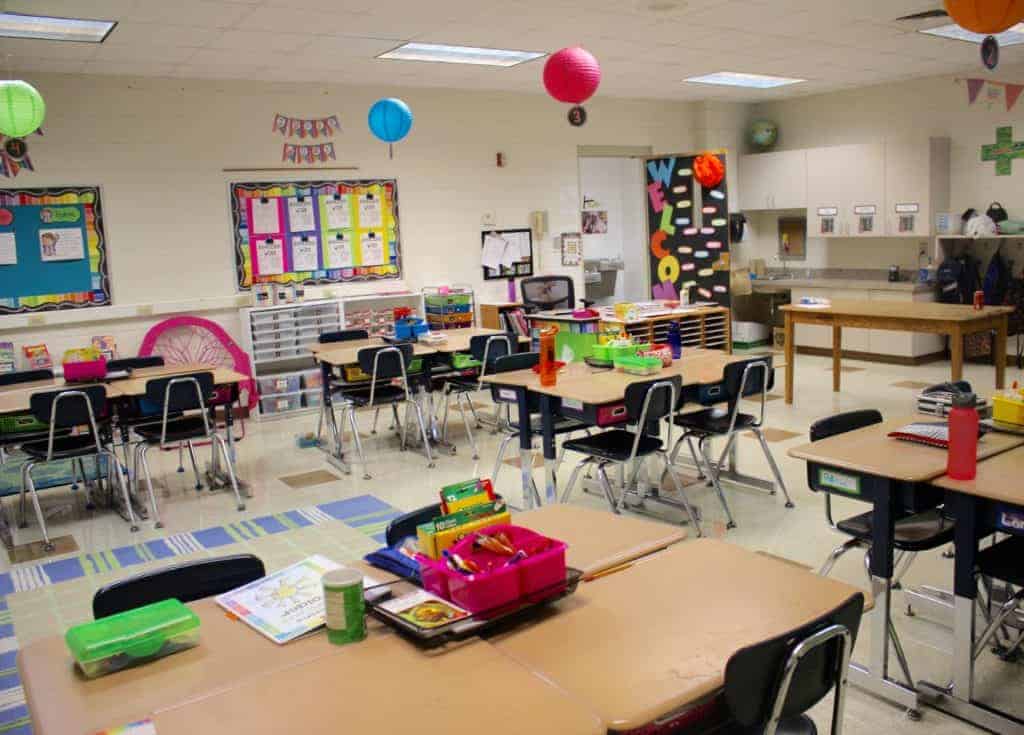
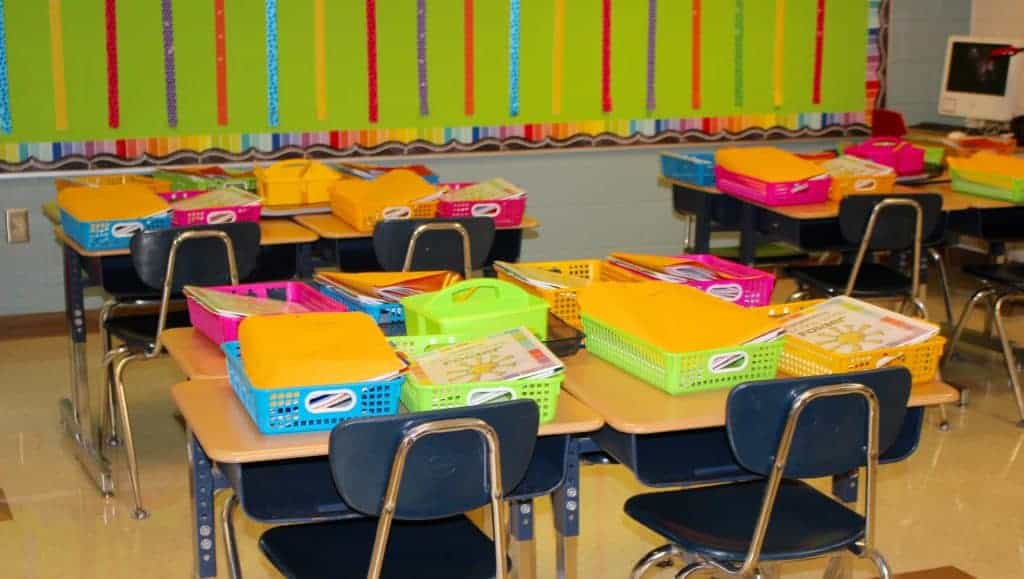
I’m using baskets inside students’ desks again, since I’ll be team teaching. These are the best way for me to keep my students organized. I like to group my desks into clusters of four, which makes group work and partner work easy.
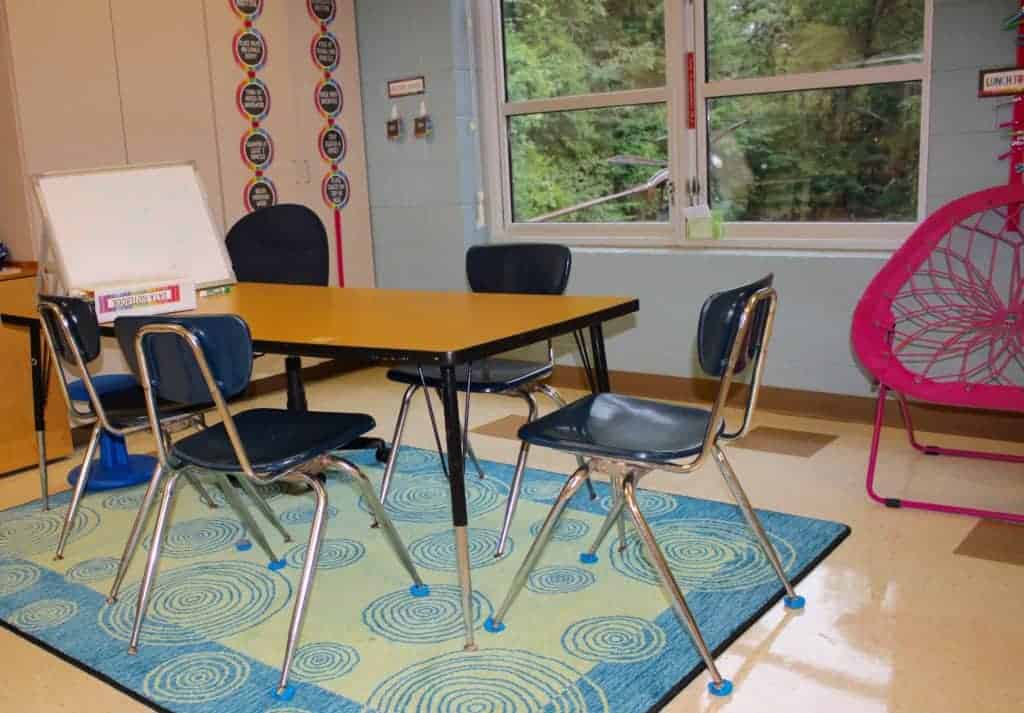
I think my favorite thing about my new classroom is that for the first time in 14 years, I have a real window! It is such a treat for me! I placed my small group table in front of the window (not too close…I’m following all the Fire Marshall’s rules). Yes, I do have three different types of chairs at my table. One day I’d love to have more wobble stools, but I’m going to take it slow. I bought one, and I’m going to try it out before I invest in adding anymore to my room. I think I’ll love it, but I want to make sure they’re not a distraction first.
Reading Area
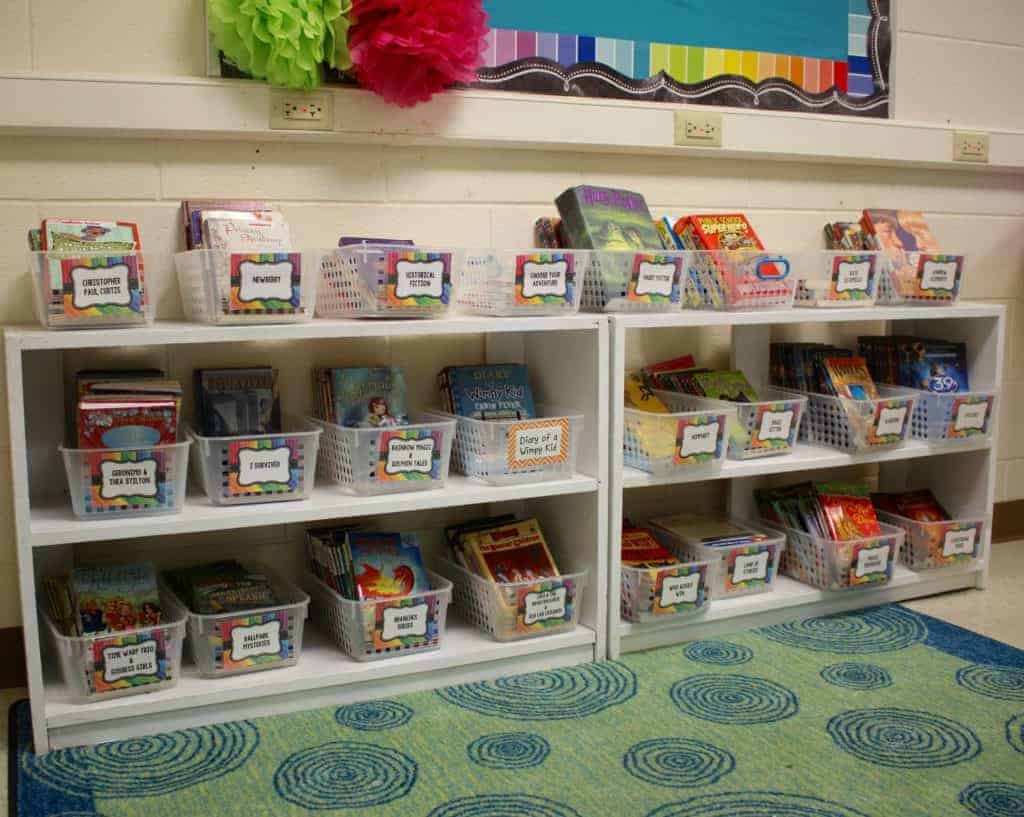
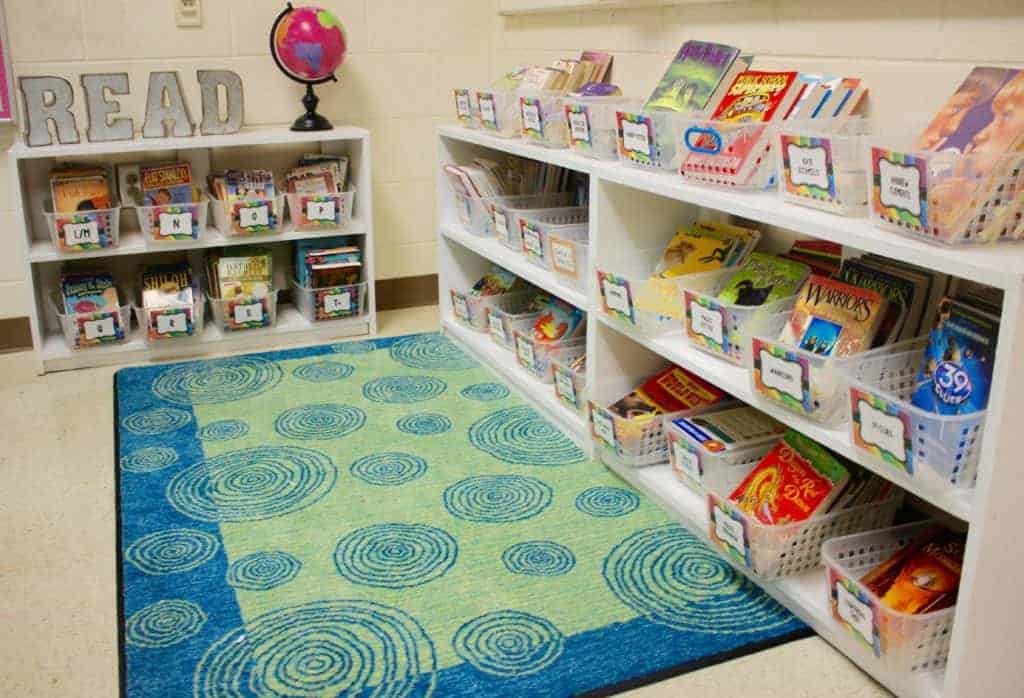
When prepping your classroom, you want to think about a space for your books. I created a small reading area for my new classroom library. It isn’t big, but I’ve never had enough space for any type of reading area before, so I love it! I organize my books into plastic baskets, with some books organized by level. I have several books organized by series. Some of my students’ favorites are Diary of a Wimpy Kid, Magic Tree House, Land of Stories, Who Would Win, I Survived, and Treasure Hunters.
I have more books that are organized by author, such as Andrew Clements, Kate DiCamillo, and Christopher Paul Curtis. I also have a few containers organized by genre. At one time, my classroom library was much larger than it is now, but I found that it was a bit too much for my students. I now try to be a bit more selective about what I include in my library, where I focus on the quality of what I offer, rather than sheer quantity of books.
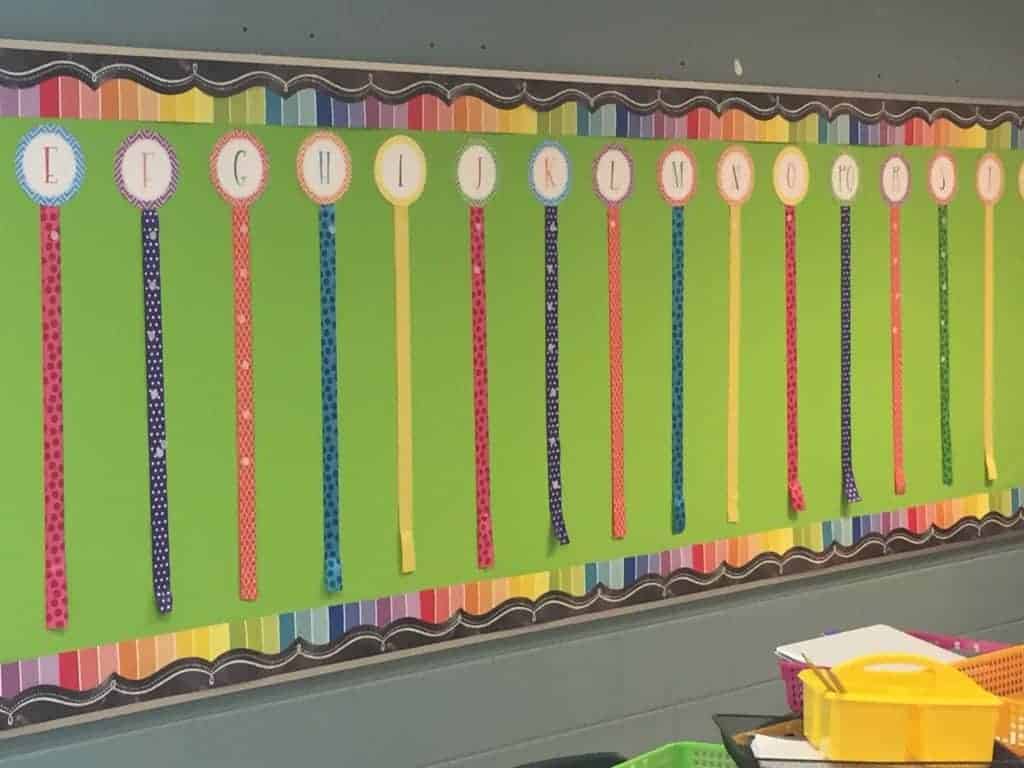
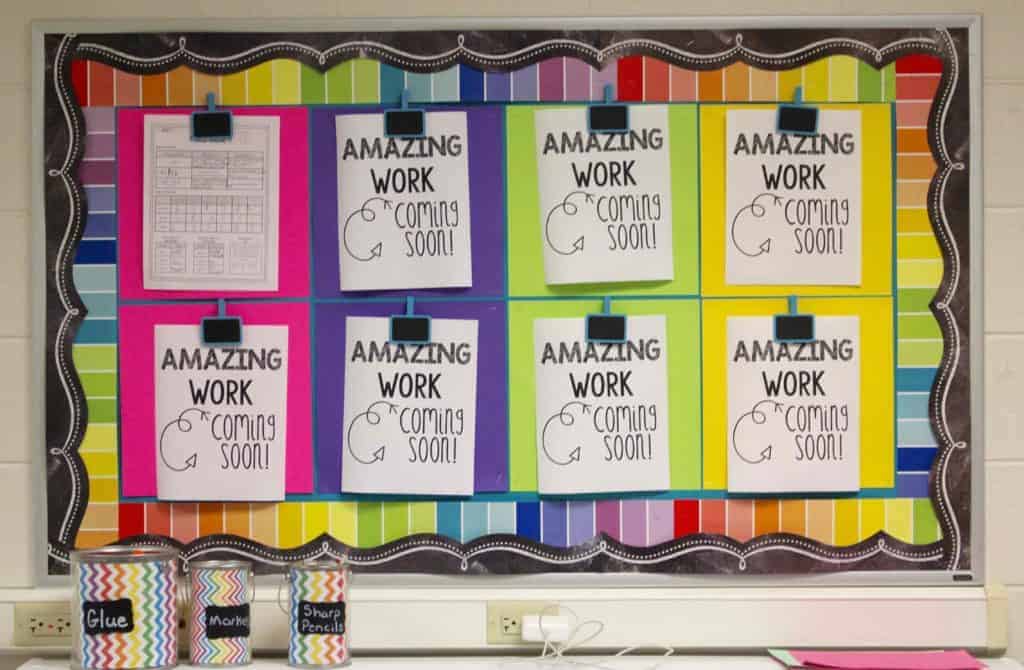
Prepping Your Classroom-Word Wall
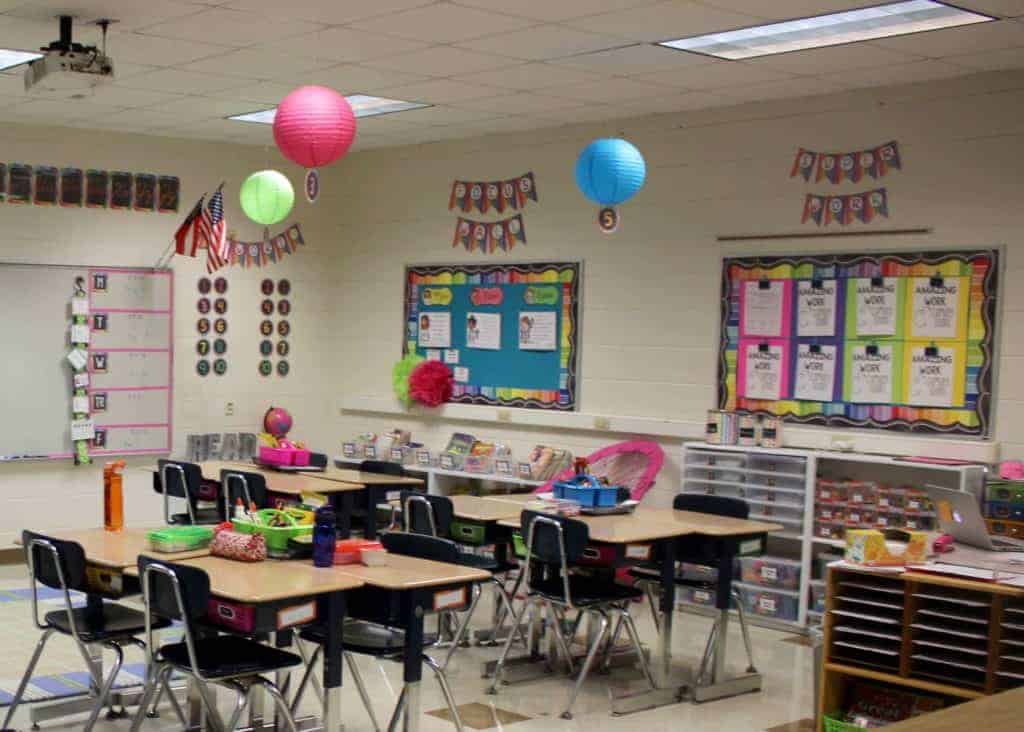
I recreated by previous word wall in my new room. My large bulletin board is on a blueish wall, so I couldn’t use my turquoise fabric. I switched to a lime green fabric, which worked because I wanted my main colors to be turquoise and lime. We will add content area vocabulary to the word wall as the words are introduced during the year, using Velcro dots to attach the words to the ribbon. I have two other small bulletin boards on the opposite side of my classroom. I cut my old turquoise fabric in half and used that for those bulletin boards. One bulletin board will display student work and the other board will display my standards and essential questions. I had originally intended to hang my anchor chart on that focus wall bulletin board, but it was WAY too small.
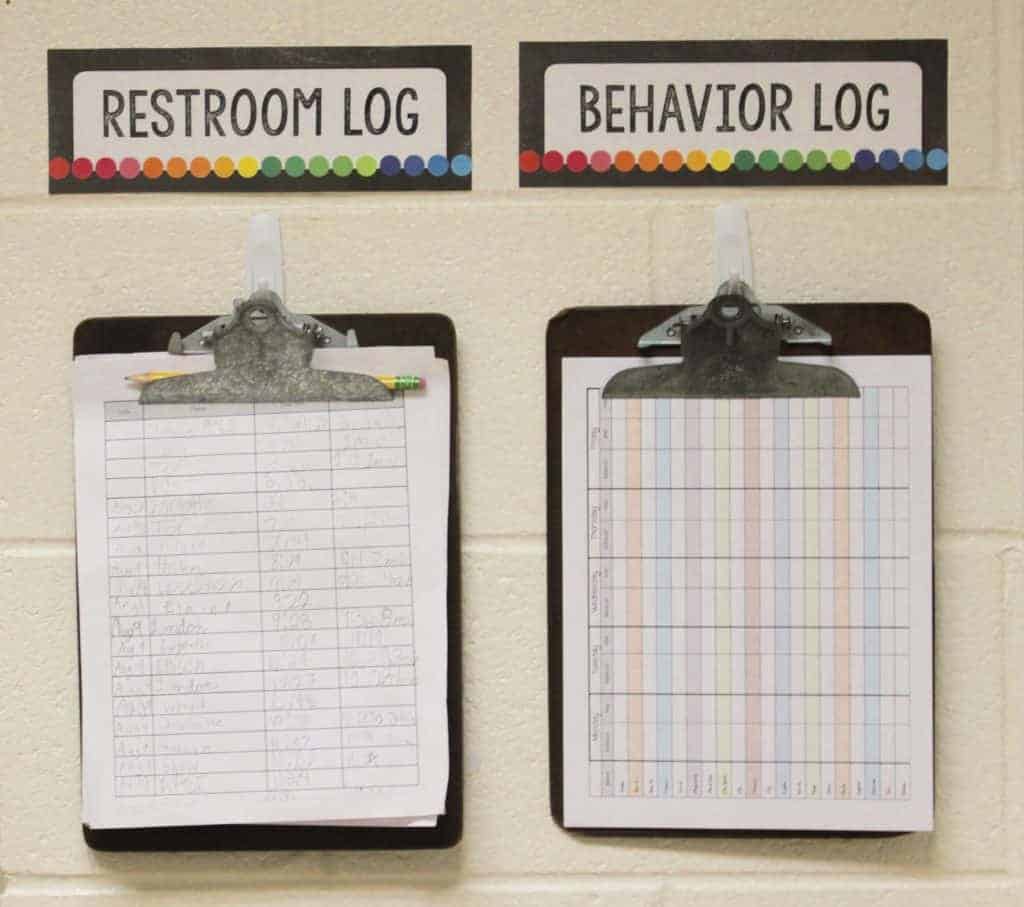
 I’m a huge fan of hanging clipboards on hooks to keep up with things like our restroom log and behavior log. I love always knowing where things are, and if you’ve seen my desk lately you know I need the help!
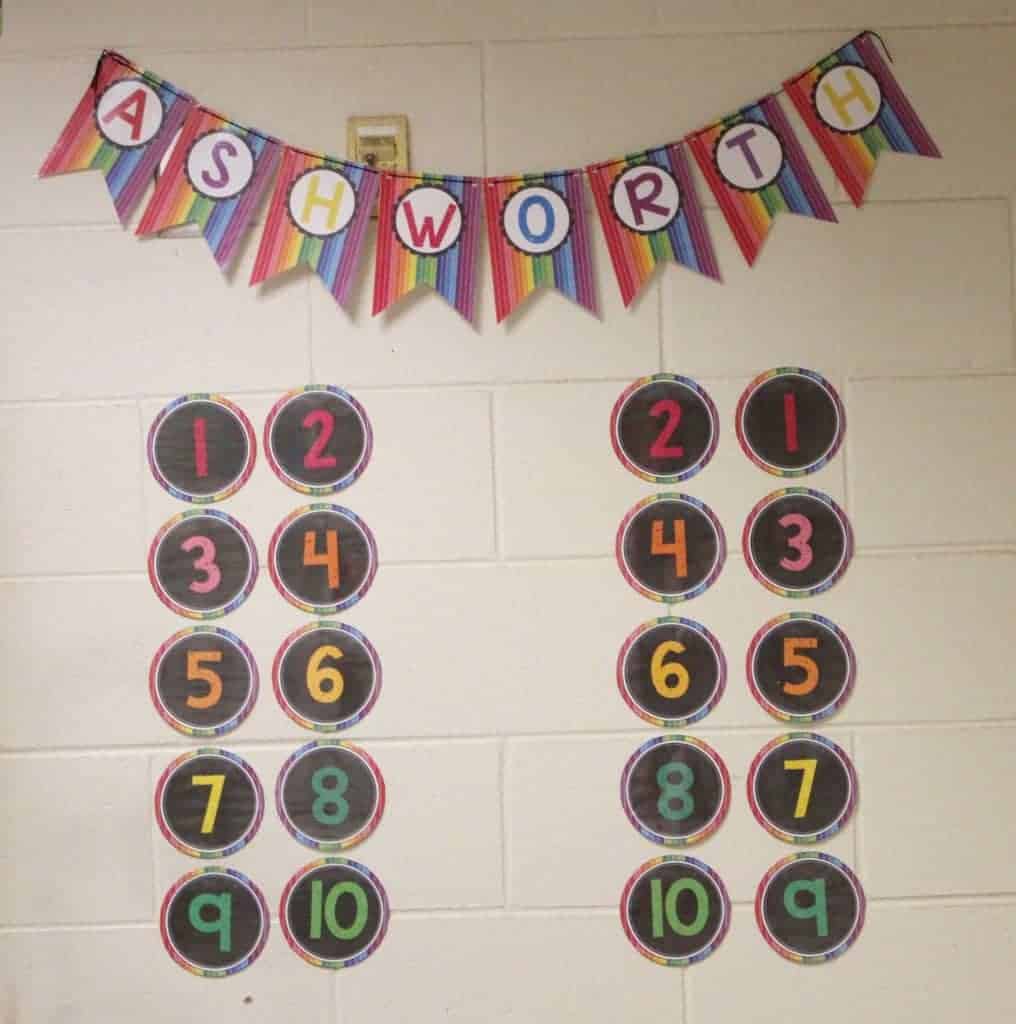
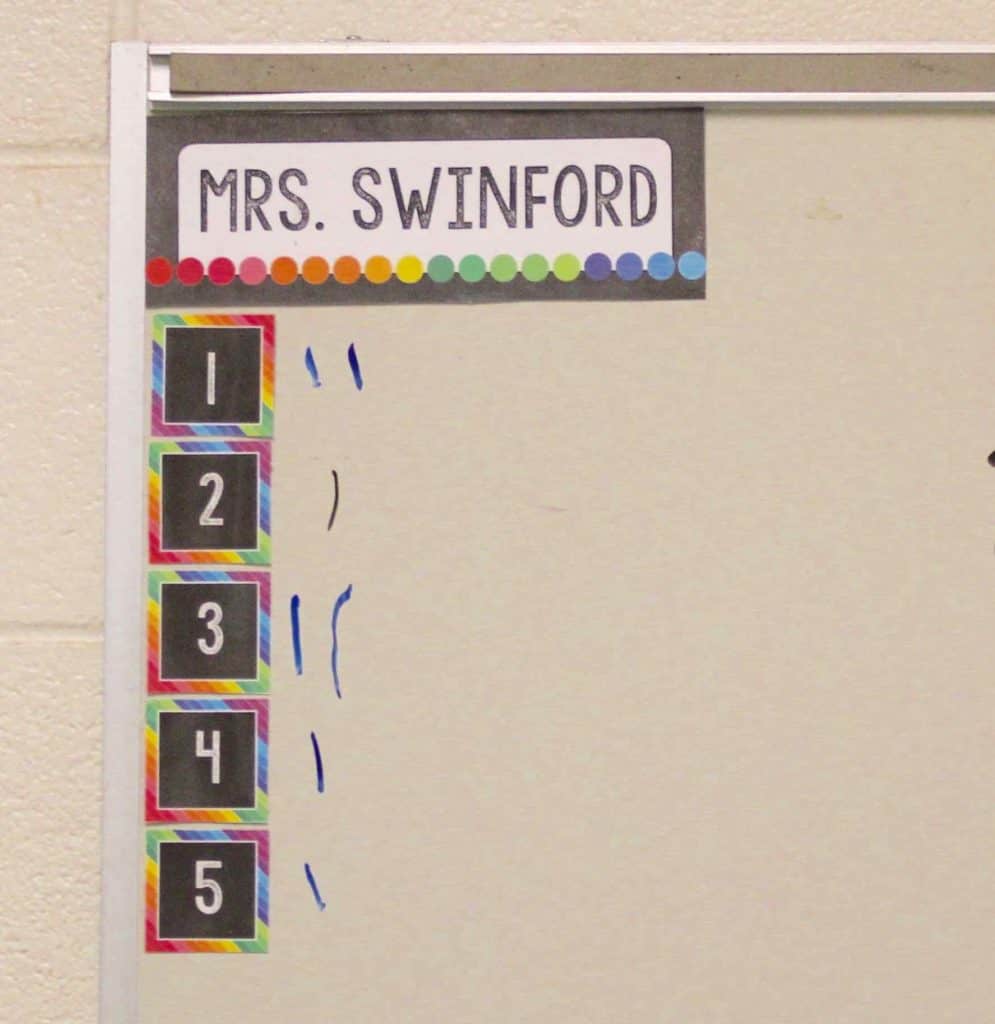
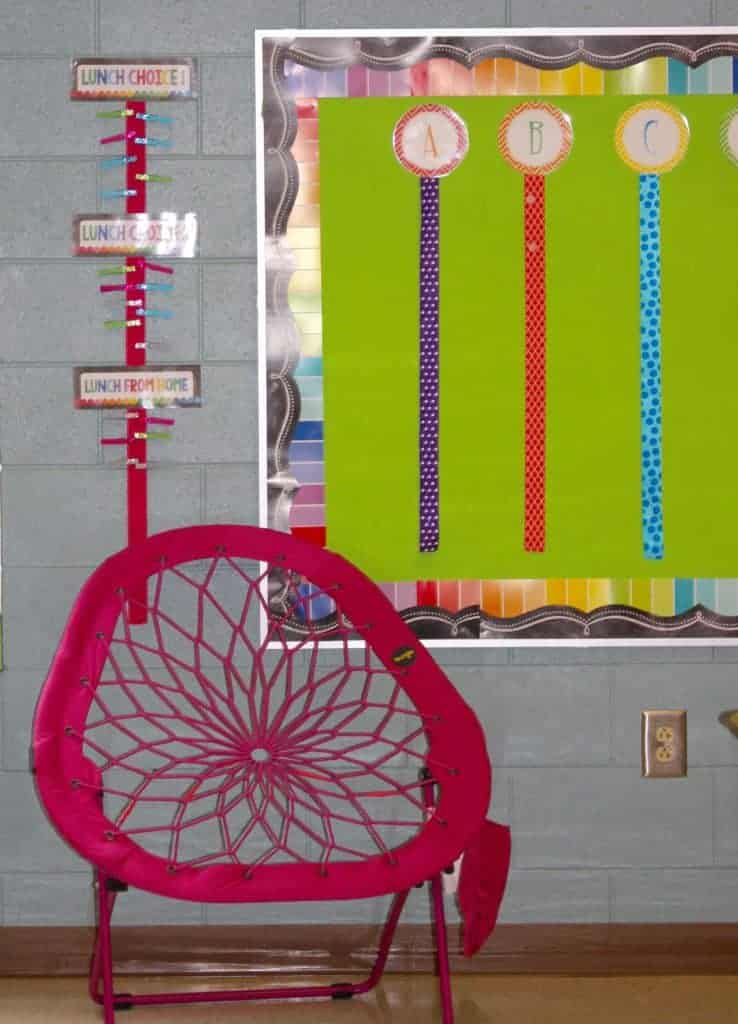
I used a large area to display my math work stations rotations. As soon as I get to know my students, I’ll place each student with a partner and will add the names to the chart. I attach the names with Velcro dots and rotate the names through the numbers. I also made little numbers for one of my behavior management ideas. Throughout the week, I give table points, and at the end of the week the table with the most points gets a small prize. I like this strategy, because it evokes a lot of encouragement from students to the peers at their tables.
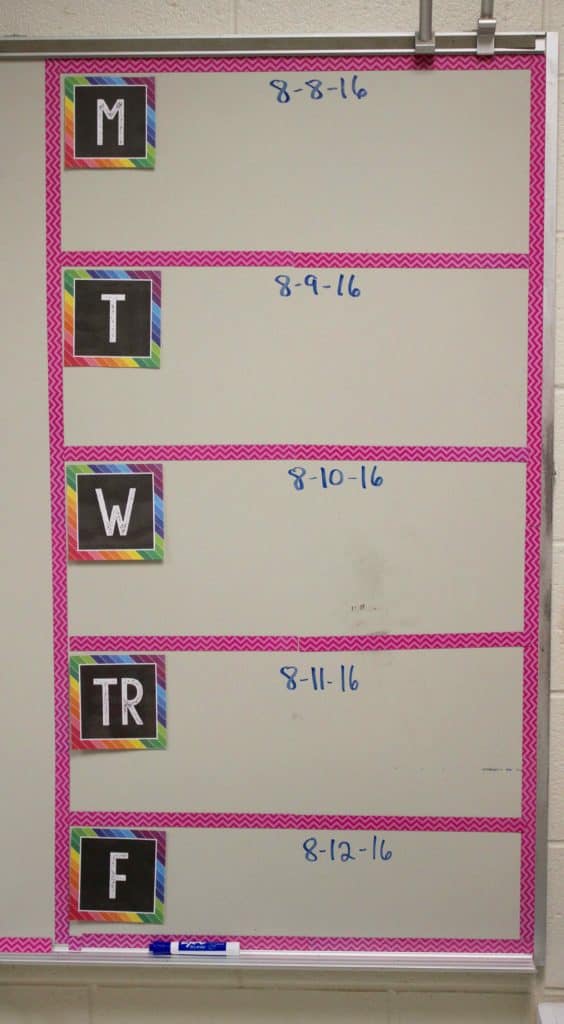
Weekly Agenda
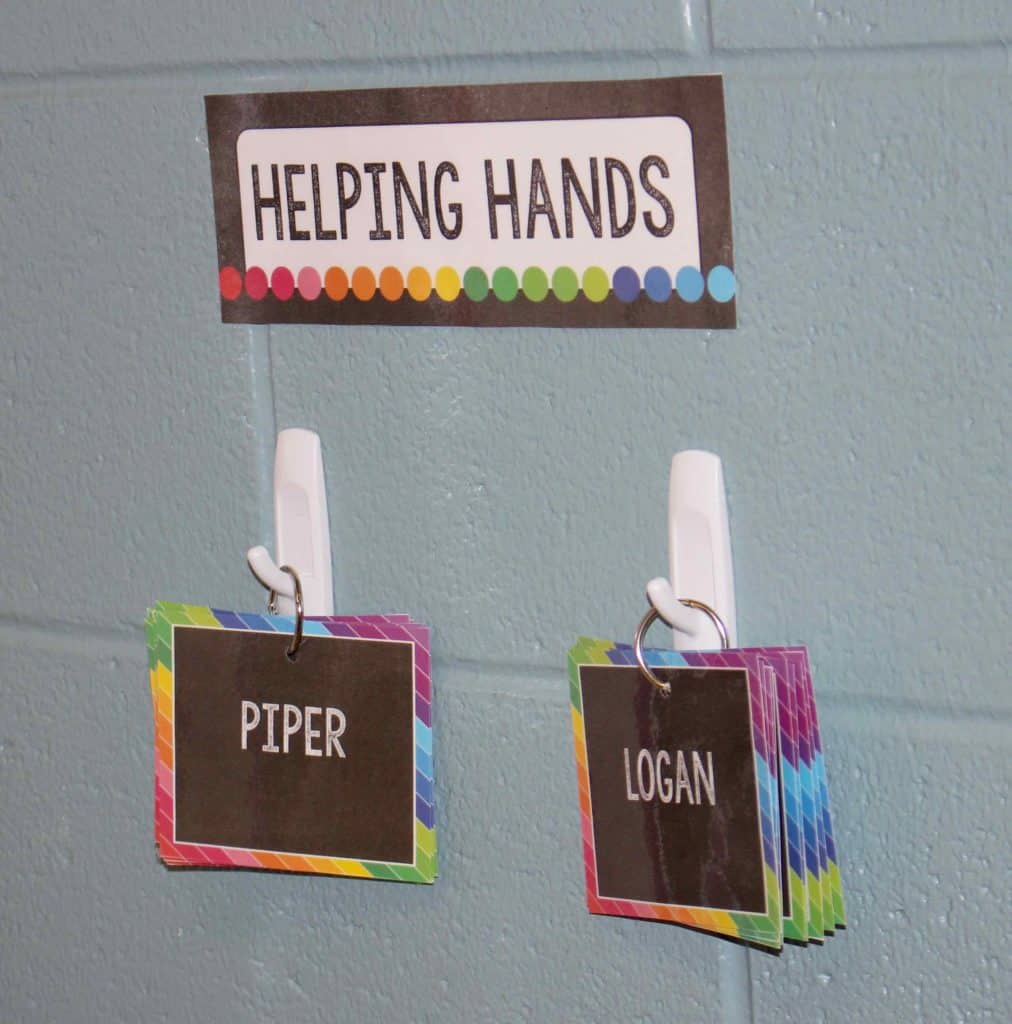
When prepping your classroom, always focus on organization. That’s my goal in everything I do. I used magnetic border on my dry erase board to set up our weekly calendar or agenda. I use this area to let students know what page of their morning work to complete and any specific activities or events to expect that day. I’m still using my “Helping Hands” for my helpers, where I have two helpers each day who are responsible for all our daily chores.
All The Labels For Prepping Your Classroom
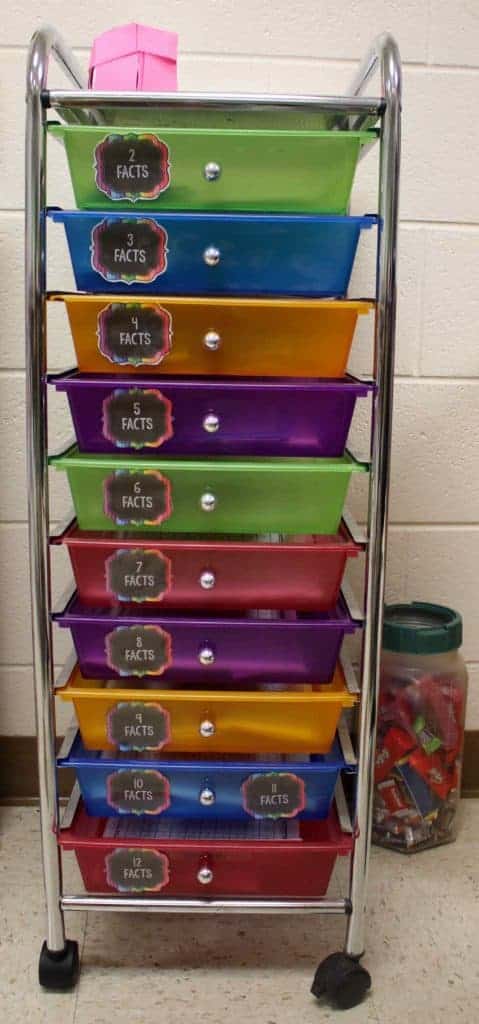
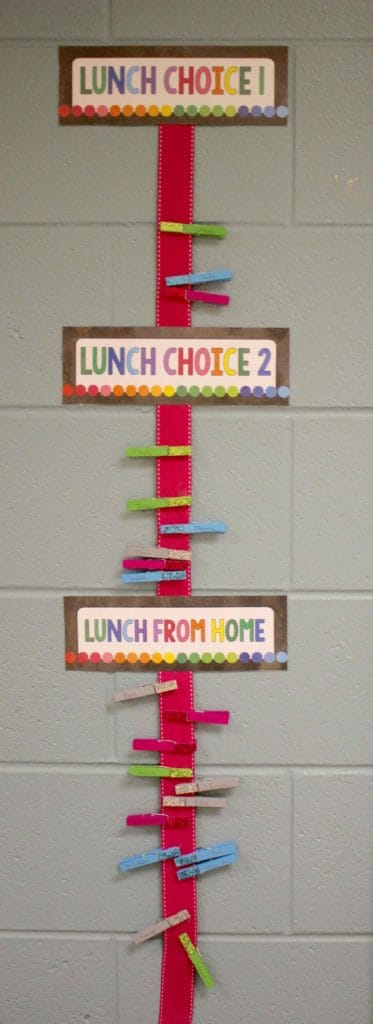
I finally labeled my multiplication fact drawers, and everyone is in the routine of getting started on math facts first thing in the morning. I’m using clothespins and ribbons for my lunch choice management. As soon as students arrive in the morning, they place their clip on the lunch of their choice. Then, my helpers take the lunch count to the cafeteria right after the announcements.
I have a parent volunteer box ready to go. In the box are things I have printed that are ready to be laminated and cut out. I’m definitely hoping to have some help this year, since I’ll be using almost all new task cards!

This year I’m tiptoeing into the world of flexible seating. I don’t think I’ll ever be comfortable without giving my students a “home spot”. Maybe I’m old fashioned or a creature of habit, but I like the idea of having a base or home spot for each student. However, I have intentionally set up additional work areas for my students. I have my small reading area, a rug in the front center of my classroom where students can sit for mini lessons. I also have my small group table that may have wobble stools one day, until then it’s regular chairs. Lastly, I have a tall table where students can stand and work, as well as two bungee chairs. The bungee chair is definitely everyone’s favorite. I quickly found that I had to set a routine for who gets to sit in the bungee chairs (the helpers).
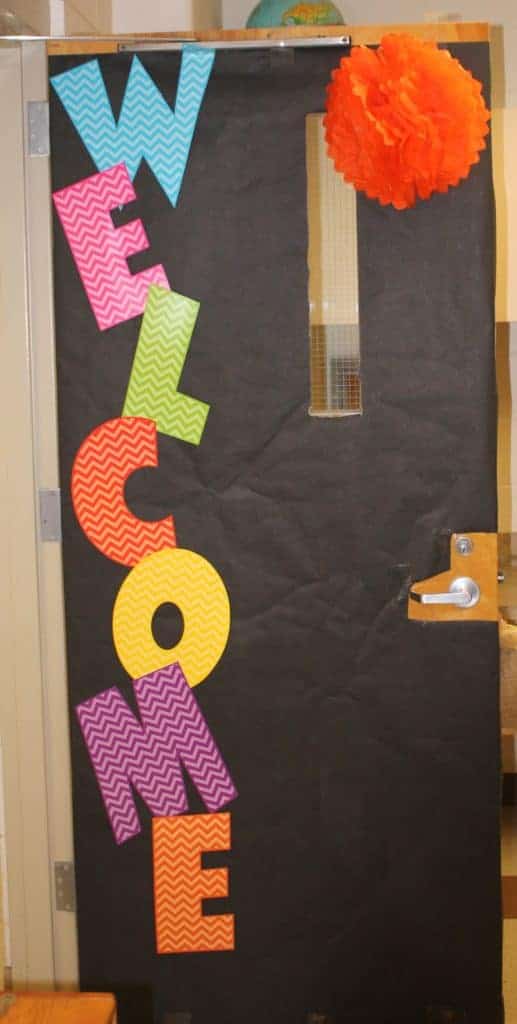
My new classroom door was incredibly quick and easy to get ready! I’ve since added matching signs with my students’ names to the door. If anyone has a tip on how to go around the handle and lock, please share!!
I look forward to making many happy memories in my new classroom! I hope you enjoyed reading this post and and some ideas you can use for prepping your classroom! If you want some more ideas for your own classroom, be sure to read my Top 8 Back to School Resources for Teachers post too! If you’re looking for ways to plan for instruction, you can check out Planning: Where to Begin.
I am a sophomore elementary education major, and I have been exploring education blogs for an assignment in my Education Technology class. I found yours and immediately bookmarked it because I love all of your ideas and I can’t wait to incorporate them into my classroom someday! Blogs like your inspire me to be creative and think outside of the box. Thank you for sharing 🙂
Oh my gosh I LOVE your rug! Where did you get it?
For going around the door handle and lock there are two options. The easiest is to cut as close to those as you can, and then placing skinny border around them. The harder way is to carefully use a razor blade to cut the perfect hole. It’s easier for the lock, the trick comes with the door handle (which you need to do first, before the lock!). Use something non-permanent, like painters tape, to get your paper where you want it on the left and top sides of the door. Without tearing, pull the right side tight over the handle. Now give a little slice, right over where the base of the handle will be (be careful to allow for the paper to move farther right once it lays flat!), but just big enough for the skinniest part of the handle to slip through on the next step. Now remove the tape from the top of the door, and carefully pull your paper to the left until you can slip the handle through your hole. It won’t go all the way down, so be prepared to carefully slice the whole bigger little by little as needed until the paper is flat against the door except for the metal ring around the base of the door handle and the lock. Cut an X shape across the lock, a little less than the diameter of the lock, and make the same style cut below on the door handle base as well. Add extra slices, always coming out from the center and stopping just short of the edge of the lock/door handle base. Eventually you’ll have so many slices, that you’ll be able to start pushing the paper down over the lock and handle base, lengthing the slices as needed so the paper doesn’t tear (be careful to not make the slices too long–you want them the EXACT size of the lock and handle base, which you won’t really get on the right-hand side until the paper lays flat!). Once you can push the paper down enough to see how it will truly lie, carefully cut the paper in the circle needed to perfectly surround the lock and handle. Important: you still have not taped anything but the LEFT side of the door! Once the holes are cut perfectly, you want to carefully take your paper back away from the door lock and handle, and add double-sided tape (or Velcro or whatever you are using to stick the paper down) to the back of the paper in many spots around the holes you’ve cut and along the right edge of the door there. Pull it back flat, and stick the paper in place. Now you’re ready to secure the paper along the rest of the right-hand side of the door, then the top, bottom, and finally the left side can be have the painters tape replaced by something more permanent. Hope that helps! If you lived in so cal I’d come help you in person!
Now my question for YOU! I love your clothes pins! Did you just paint them and dip them in glitter for the sparkles? Can you show me one close up, or explain your process? Anytime I try to add glitter to something that will be touched by student hands, the glitter never lasts long! But those are so cute, I’d really like to do that to the boring clothespins I use!
Thank you so much!!! I cannot wait to try this out!
Unfortunately I cannot recommend the clothes pins. I bought them from Etsy, and over half of them broke before the year was out. I had some little ones from Micahels that seemed to hold up better.
Hello Ashleigh,
I so enjoy reading your posts. I recently discovered your blog and resources early this summer, and I look forward to trying them out this school year.
Do you have these labels to edit, print, and purchase that I can find? Like “helping hands”, “behavior log” etc???
Thanks!
I purchased the templates from Schoolgirlstyle.com.
Love your classroom setup. Got some great ideas! thanks for sharing.
I used chalkboard contact paper on my door this year and it came out perfect. All you need is an exacting knife and something to smooth it out as you go.
Love the huge letters, where can I get them?
So sorry for not giving you any tips for your locks and handle. Howeever, love your class room.